AI for beginnersGuide
What is ACP (Agent Client Protocol)? Bring your own agent
ACP is the socket between a code editor and a coding agent. Here is how it differs from MCP and where your model and API key fit in.
On this page
Android Studio now offers a menu of 40-plus coding agents, and the news about it keeps mentioning three letters: ACP. Here is the short version. The Agent Client Protocol (ACP) is a shared socket between a code editor and a coding agent, a bit like USB between a computer and whatever you plug into it. Any editor that speaks ACP can host any agent that speaks it. MCP is a different cable: it connects an agent to tools and data, not to your editor.
The news hook is Android Studio. The Android Developers blog (28 October 2026) says Android Studio Rabbit 2, now stable, ships “Bring Your Own Agent”: you pick from over 40 coding agents, including Claude Agent, Codex from OpenAI, Junie and Google Antigravity. The post never spells out “ACP”. The name and the mechanics come from the ACP introduction (checked 1 November 2026).
Why a socket at all?#
Say there are 5 editors and 8 coding agents. If every pair needs its own hand-made connection, that is 5 × 8 = 40 integrations, and each new agent means five more jobs for five editor teams. If everyone agrees on one socket, each editor builds it once and each agent builds it once: 5 + 8 = 13 pieces of work. That is the whole idea.
The ACP site makes the same comparison with LSP, the Language Server Protocol, which lets one language server work in many editors. Same trick, applied to coding agents: any ACP agent works with any ACP editor, with no custom integration per pair.
Flashcards
Words you will meet around ACP
Tap a card to flip it
How ACP works, in plain words#
Picture two colleagues passing notes through a mail slot. The editor writes a request, the agent writes back what it wants to show. For a local agent, that mail slot is literal: the editor starts the agent as a sub-process on your machine and they exchange JSON-RPC messages over stdio. Every message has the same general shape:
{ "jsonrpc": "2.0", "id": 1, "method": "…", "params": { … } }The method names are defined by ACP itself, so you never write these by hand. The editor and the agent do.
Agents don't have to live on your laptop. Remote agents use HTTP or WebSocket, though the ACP site says full remote support is still a work in progress. And because the protocol is built for coding, it re-uses MCP’s JSON representations where possible and adds types for things an editor needs to draw, such as diffs. That is why a proposed change can show up as a diff in your editor instead of a wall of text.
ACP vs MCP: which one connects what#
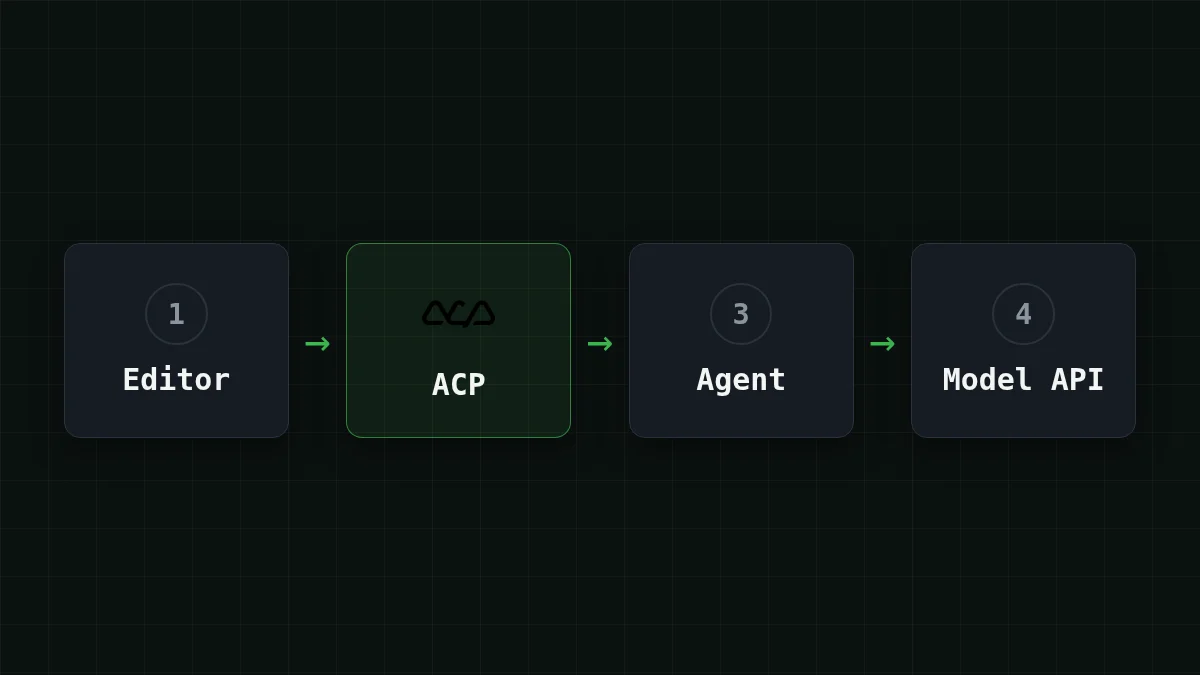
Put the agent in the middle. On one side is your editor, and that link is ACP. On the other side are the things the agent works with: files, databases, services. That link is MCP. They sit on different sides of the agent, so they don't compete. If MCP is new to you, start with our plain-English MCP guide.
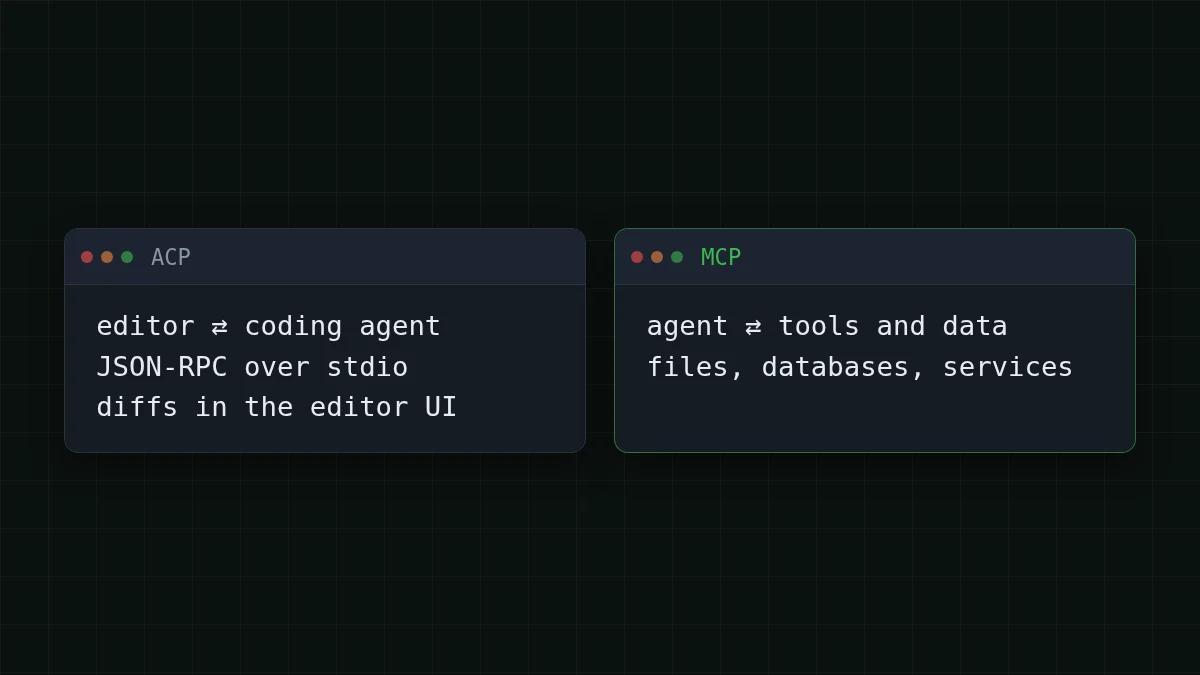
They are close relatives, too: as noted above, ACP borrows MCP’s JSON representations where it can. Try matching them yourself:
Match the pairs
Match each name to what it connects
Tap an item on the left, then its pair
- ACPEditor ⇄ coding agent
- MCPAgent ⇄ tools and data
- JSON-RPC over stdioHow a local ACP agent talks to the editor
- Model API (base URL + key)Agent ⇄ language model
Bring your own agent in Android Studio#
Without a shared protocol, adding an agent to an editor is the editor vendor’s job. With Android Studio Rabbit 2 you choose the agent yourself. According to the Android Developers post, you open the agent window and select an agent, or pick one in Settings > Tools > AI > Agents. Then you authenticate and send your first prompt. The post says only “authenticate”; what that asks for depends on the agent you chose, so the agent’s own docs are the place to look.
Here is the order, if you want to check yourself:
Put in order
Put the Android Studio steps in order
Drag the items or use the arrows
- Open Android Studio Rabbit 2
- Select an agent (agent window or Settings > Tools > AI > Agents)
- Authenticate
- Send the first prompt
Where the model and the API key sit#
This is the part that confuses most beginners. The ACP link carries the conversation between the editor and the agent. The agent still needs a language model to think with, and that is a separate connection, usually with its own login or API key. Switching the editor does not change the model, and switching the model does not change the editor. The Android Studio post says nothing about custom keys or models, so what you can change depends on the agent you pick.
Some agents let you point them at an OpenAI-compatible endpoint: a base URL, a key and a model id. When yours does, this is the entire model-side connection, and you can test it in a terminal before touching any settings (the key is a placeholder in an environment variable):
curl https://api.cheaptokens.dev/v1/chat/completions \
  -H "Authorization: Bearer $CHEAPTOKENS_API_KEY" \
  -H "Content-Type: application/json" \
  -d '{
    "model": "deepseek-ai/DeepSeek-V4-Flash-0731",
    "messages": [{"role": "user", "content": "Explain ACP in one sentence."}]
  }'
You get back a JSON answer with the text in choices[0]. and the token counts in usage. Coding agents re-send a lot of context on every step, so a long-context model suits them. In CheapTokens that is DeepSeek-V4-Flash: a 380K context window, up to 32,768 output tokens per answer, one price at any hour of the day and one balance across all models. The API is OpenAI- and Anthropic-compatible. Take the exact model id from the CheapTokens docs; ids differ between providers. The DeepSeek models page has the details.
Not sure which tool takes a custom key? Our guide where to plug in your own API key walks through chat, editor, terminal and code. And if “base URL” is a new term, read what base_url is and how to switch.
Try it yourselfTry it: you installed an ACP agent. Which connection do you change to switch the model it uses?Show answer
Not the ACP one. The editor-to-agent socket stays as it is. The model is the agent’s own setting: base URL, key and model id in the agent’s config, if the agent exposes them.
What to do next#
Open the docs of the agent you want and look for where it sets the model. If you're curious how the agent works inside, how an AI agent works: the loop shows it step by step. ACP only answers one question, how the editor and the agent talk. Everything else stays between the agent and its tools and model.


